Are you looking for a fun and functional DIY project? Turn a thrifted picture frame into a stylish DIY cork and pin board! It’s an excellent way to organize jewelry, photos, keys, and more. Plus, it’s a great way to repurpose items and add a personal touch to your décor. Let’s dive into the step-by-step process.
DIY Cork and Pin Board Project Steps
Materials Needed:
- Picture Frame from Goodwill NCW (any size you prefer)
- Cork sheet (available at craft stores)
- Spray paint (color of your choice)
- Scissors or craft knife
- Thumb tacks or push pins
01
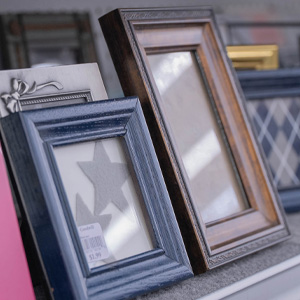
Find the Perfect Frame
Head to your local Goodwill NCW store and find a picture frame that catches your eye. Look for a frame that is sturdy and has a flat back. The size is up to you, depending on how much space you need for your cork board.
02
Prepare the Frame
Remove the backing, glass, and any existing picture or matting from the frame. Clean the frame thoroughly to ensure the spray paint adheres well.
03
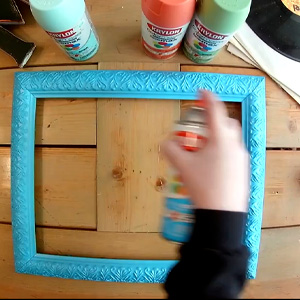
Spray Paint the Frame
In a well-ventilated area, lay down some newspaper or a drop cloth to protect your surface. Shake the spray paint can well and apply a light, even coat to the frame. Allow it to dry completely, then apply additional coats as needed for full coverage. Let the frame dry thoroughly between coats.
04
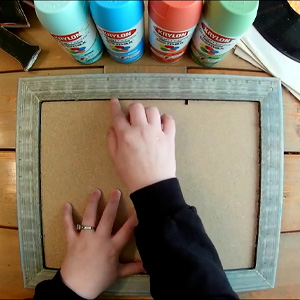
Cut the Cork to Size
Once the frame is dry, use the glass from the frame as a template to cut the cork sheet to the correct size. Place the glass on top of the cork and trace around it with a pencil. Carefully cut the cork along the traced lines using scissors or a craft knife.
05
Attach the Cork to the Frame
Place the cut cork sheet into the frame where the glass used to be. Make sure the cork is flush with the edges of the frame.
06
Add a Backing (Optional)
If the frame had a backing, you can reattach it to give your cork board extra stability. If not, you can cut a piece of cardboard to size and secure it to the back of the frame with glue or tape.
07
Hang Your Cork and Pin Board
Your DIY cork and pin board is now ready to use! Hang it on the wall using picture hangers or place it on a desk or shelf. Use thumb tacks or push pins to display your jewelry, photos, keys, and other small items.
Tips and Ideas:
- Customize your cork board by adding a decorative border or painting patterns on the cork.
- Use decorative thumb tacks or push pins for a stylish touch.
- Create multiple boards in different sizes and colors for a fun, eclectic look.
This simple and affordable project is a fantastic way to organize and display your favorite items. Plus, it’s a great way to give new life to a thrifted frame. Happy crafting!
Share your creations with us on social media using the hashtag #GoodwillDIY. We can’t wait to see your unique and creative cork and pin boards!
Check out the other upcycled projects we’ve recently featured and get inspired to create your own unique fashions and décor.