Looking for a cute, fun way to display utensils for an event or outdoor picnic this summer? We have great DIY mason jars to try out!
DIY Mason Jars Project Steps
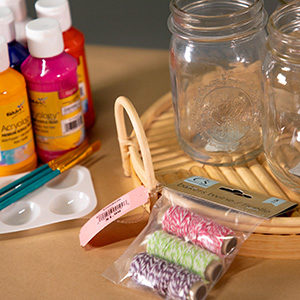
Supplies needed:
- Thrifted mason jars
- Tray, optional
- Twine
- Paint
- Paintbrushes
- Water
- Paper towel
01
Remove the price tags from your thrifted mason jars and thoroughly clean the glass according to the instructions on your paint.
02
To make sure the colors pop, paint the jar with one coat of white paint as a base layer. Allow to dry completely.
03
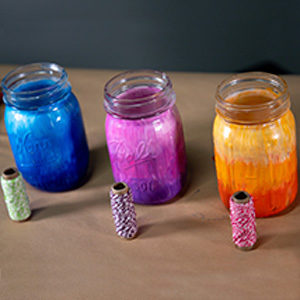
Paint your jars. You can decorate them in any way you like. We chose to do an ombre look.
04
Start with the darker color at the base of your jar and paint about ⅓ of the way up.
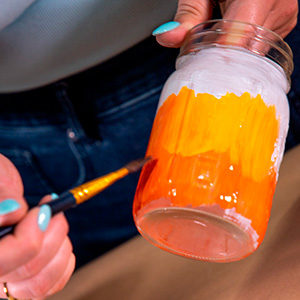
05
Next, take the lighter version of this same color and dip your paint with half the dark color and half the lighter color on the brush. The two colors will blend while you are painting. Start painting the middle ⅓ of the jar and blend down, overlapping into the darker paint.
06
Rinse brush completely and finish the jar by using the lightest version of the color and blend from the top of the jar into the remaining color. To make the color even lighter, you can add white paint into the top section.
07
Once you’ve fully painted your jars, let them dry completely. Add colorful twine at the neck of the jar to add the final detail to the jars.