Scrunchies were extremely popular in the 1980s and 1990s and have now made a comeback! You can choose any thrifted shirt to repurpose and create your own unique DIY scrunchies.
DIY Scrunchies from Thrifted Shirt Project Steps
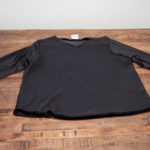
We found a black velvet shirt for our DIY scrunchie. Be sure the piece is washed, and any stickers or price tags are removed.
Supplies needed:
- Fabric from a Goodwill thrifted shirt
- Sewing machine
- Needle and matching thread
- Quilting ruler
- Scissors
- Elastic
- Safety pin
01
Reverse your shirt and lay flat to begin prepping for cutting.
02
Using your quilting ruler, measure your fabric and cut out a 12-by-6-inch piece from the center of the fabric.
03
Measure and cut your elastic to 8 inches.
04
Fold fabric in half, with the reverse side up. Pin edges of fabric together.
05
Sew pinned seam together with a sewing machine. Turn sewn piece right side out.
06
Align seams together and stick seams together, leaving a small gap.
07
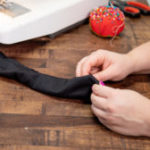
With the safety pin attached to the end of the elastic piece, pull the elastic through the center of the scrunchie.
08
Hand stitch elastic together, then hand stitch gap closed.
Scrunchies are quick and easy to make, and they make great gifts! Enjoy your unique scrunchie in your hair or on your wrist!